How to convert your Zoom recordings
Have you been taking notes during your Zoom meetings? If yes, you know so much can be left out in note-taking.
Imagine if you could refer to the entire video or audio on your computer whenever you need it. Cool, right? Tech issues, unplanned distractions, and other problems may make you miss some essential details in your virtual meeting.
A recording is the best way to preserve all the important information discussed in the numerous remote meetings going on.
If you are the host, you can easily do it. If you are a participant, you can ask the host for recording permissions. The host does this by clicking on the ‘Manage Participants’ hover on the person’s name and click on the ‘More’ option. A drop-down pops up and choose ‘Allow Record.’
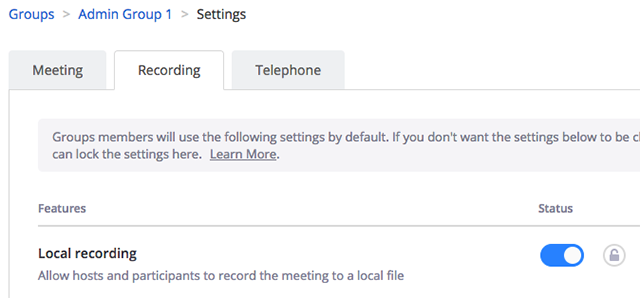
Also, remember to enable ‘Local Recording’ for your audio/video to be saved on your computer. Sign in to your Zoom web portal account as admin and click on the Settings button. Choose Recording, go to Local Recording, and Turn on if it’s off.

Here’s how to record a Zoom meeting.
Once you have joined the meeting and everyone is set to go, start recording. Press the ‘Record’ button that’s at the button of your Zoom window to start recording.

The pause/stop buttons can be seen in place of the ‘record’ button.
When the meeting ends, Zoom converts your recording and stores in the MP4 format for video and audio. And M4A for audio-only files.
To access and convert your recordings go to:
- PC users: C:\Users\User Name\Documents\Zoom
- Mac users: \Users\User Name\Documents\Zoom
Now, you can convert your audio/video file to your desired format. From m4a audio to weba, mp3, wav, etc. and mp4 video to wav, avi, mov, you name it.
Filestar is an easy, fast, and secure platform that will ensure all your confidential and private meeting conversations remain that.
Follow these simple steps. It will take you less than a minute. Check it out!

You can also convert mp4 to WebM or any other format you want.