Advanced Renaming Function with Filestar
If your day-to-day work involves dealing with a large number of files, you know the excruciating pain that’s associated with renaming. Renaming one file is straightforward. No hassles. The problem starts when you want to make changes to a long list of files. Photographers, designers, content marketers, accountants, and many more people fall under this umbrella.
So how can you make this process less painful? What is the quickest method to replace spaces with underscores on the file names? Or let’s say you want to add some alphabetical letters to your file names. How do you go about it without losing your mind?
While there are numerous methods and tools to batch rename complete file names, the challenge pops up when you want to rename just a particular part of all your files.
You can do it with the old classic method and deal with every file separately.
- Right-click on a file.
- An action box will pop up. Click on Rename.
- Then a highlighted text editor appears, rename by typing in the naming scheme you want.
It’s a torturous thing to do for each file if you have a long list. But it’s not impossible to automate the process. How?
With Filestar of course!
Advanced Renaming with Path Template
With a path template, you can easily create renaming rules and automate the renaming process.
How to rename files with Filestar
Let’s say you want to add the word ‘-Online’ to a batch of files in a folder. Here is how to go about it.
- Download Filestar and install it on your PC.
- Right-click on the file(s) you want to rename and select ‘Convert with Filestar’.
- Type ‘rename’ on the search box.
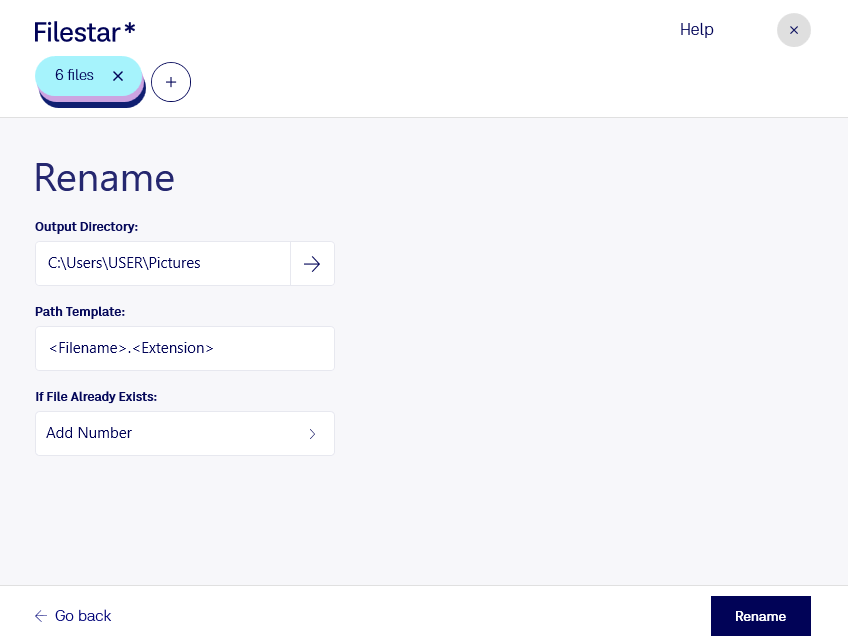
This window will now appear on your screen:

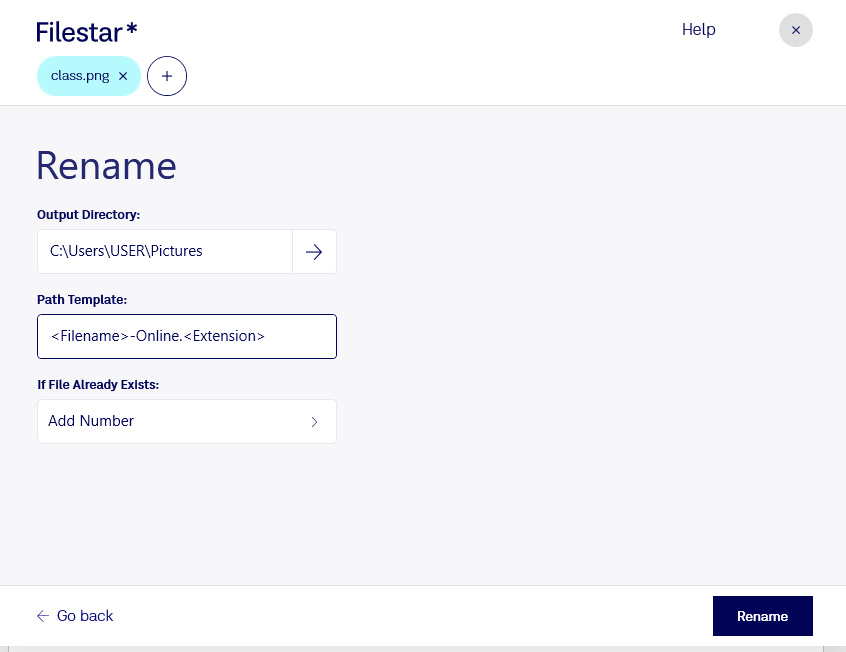
- Type in the filename you want to add under the Path Template tab. In our case:
<Filename>-Online.<Extension>

- Click ‘Rename’. Done!
The <Filename> and <Extension> are called tags and are replaced with the original filename and extension.
Read our detailed advanced renaming with path templates guide to learn more about renaming in Filestar.
